A Mother and her two daughters come together to form The White House Boutique...
Friday, November 30, 2012
{DIY} Deck the Halls with WREATHS
Friday, November 16, 2012
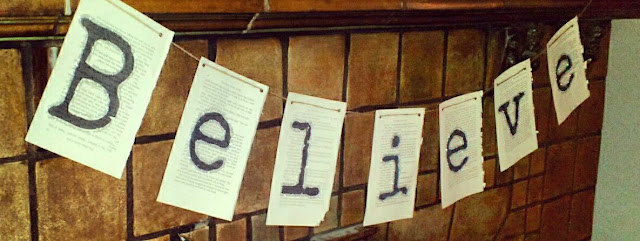
DIY {believe} Banner

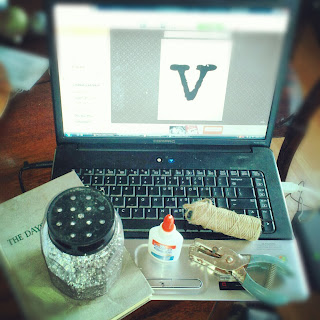
This weeks DIY is this shabby chic book page banner....so cute hung above your mantle, windows, pretty much anywhere! Super easy and here is what you need:

- a random book you don't mind destroying
- computer/printer
- glitter
- glue
- twain
- painters tape {optional}
Here are the steps
- First you need to decide what you want your banner to say {in this case I choose the word BELIEVE} one of my favorites for Christmas! Tear the pages out of your book carefully making sure to get the full page from the binding.
- Next pick a program on your computer to type the letters. You will be printing them one letter at a time. I like to use the program picmonkey.com but your microsoft word, or photo editors will be able to do this for you as well.
- Make your letter quite large so it takes up at least 3/4 the page. When printing make sure that you are printing a 5x7 so it will fit on your book page. I print from windows photo gallery. I cheat and tape my book page with painters tape {this way it won't tear the paper when you take it off} to where it will print on an 8.5x11 sheet of paper. See pictures below! Print our your letter.
4. Once you have created your word, I added a little glitter around the edges of the letter just to give it a little extra Winter sparkle.
5. Punch holes in both corners of each letter in the upper right and left corners!
6. String with your twain {or any ribbon of choice} and you have now created your banner!!
Merry Making!!
Merry Making!!
Friday, November 2, 2012
{DIY} Shabby Christmas Ornaments
What You Need:
Mod Podge
Sheet Music or pages from a Book
Ornaments....Any Kind
Sparkling Crystal Glitter {pearl}
Tear paper in little chunks

I just dig in and get all messy. Dip paper pieces in Mod Podge and smooth and cover the ornament. If the metal top of the ornament comes off I take this off until I am done covering my ornament. Cover the ornament completely with the paper. Then I set in a bowl and sprinkle with my crystal Glitter to give it a little glitz.
They are Cute like that....or you can add cute little banners to them such as these....I just quickly stamped Christmas themed sayings and cut them out banner style added with a little silver glitter. Christmas tree BLING {DIY}
How to make your own Christmas tree {bling} instead of spending lots of $ at the Craft stores! It's so SIMPLE!
What you need:
twigs/sticks {we found ours at the dollar store}
glue
glitter
or spray paint
Step 1: This is when you decide if you want bling or just a pop of color added to your tree. With the red branches I just went in my backyard and picked some random sticks! With the bling ones you could use sticks/twigs from your backyard as well I just happened to pick up some twig arrangement at the dollar store and used them!
Step 2: With the spray paint I just added a tarp to the ground placed the sticks on top of the tarp and sprayed away making sure to cover all sides! Let dry! Easy as that! Add to tree or vase and you have some super cute modern decor!
Step3: With the glitter we just rolled them in Elmers glue covering all sides.
Step 4: Next we rolled them in glitter! TahDah...these are complete.
Let dry and add them to a vase or to your christmas tree for a little extra Glitz & Glam! So fun and So EASY!!
The Glammed out tree: So pretty...
What you need:
twigs/sticks {we found ours at the dollar store}
glue
glitter
or spray paint
Step 1: This is when you decide if you want bling or just a pop of color added to your tree. With the red branches I just went in my backyard and picked some random sticks! With the bling ones you could use sticks/twigs from your backyard as well I just happened to pick up some twig arrangement at the dollar store and used them!
Step 2: With the spray paint I just added a tarp to the ground placed the sticks on top of the tarp and sprayed away making sure to cover all sides! Let dry! Easy as that! Add to tree or vase and you have some super cute modern decor!
Step3: With the glitter we just rolled them in Elmers glue covering all sides.
 |
| Roll in Glue |
 |
| Roll in Glitz |
The Glammed out tree: So pretty...
Subscribe to:
Comments (Atom)


